Tying a Batwing Bow Tie (or any other bow tie)
Tying a bow tie is often thought of as being very difficult. But once you’ve taken a little time to learn, we think you’ll find it’s as easy, if not easier, than tying a necktie. Follow the directions below to get the basic knot down. Once you get the hang of it, make five or ten time more bow tie knots in a row. After that you should have it for good. The diagram uses a batwing bow tie style, sometimes called the straight or slim bow tie. It is less common than other styles of bow ties and has no flares at the end. Our bow ties at Olaf Olsson are batwing style bow ties that are 2” at the ends and create a beautiful small bow tie that is modern, elegant, and understated.
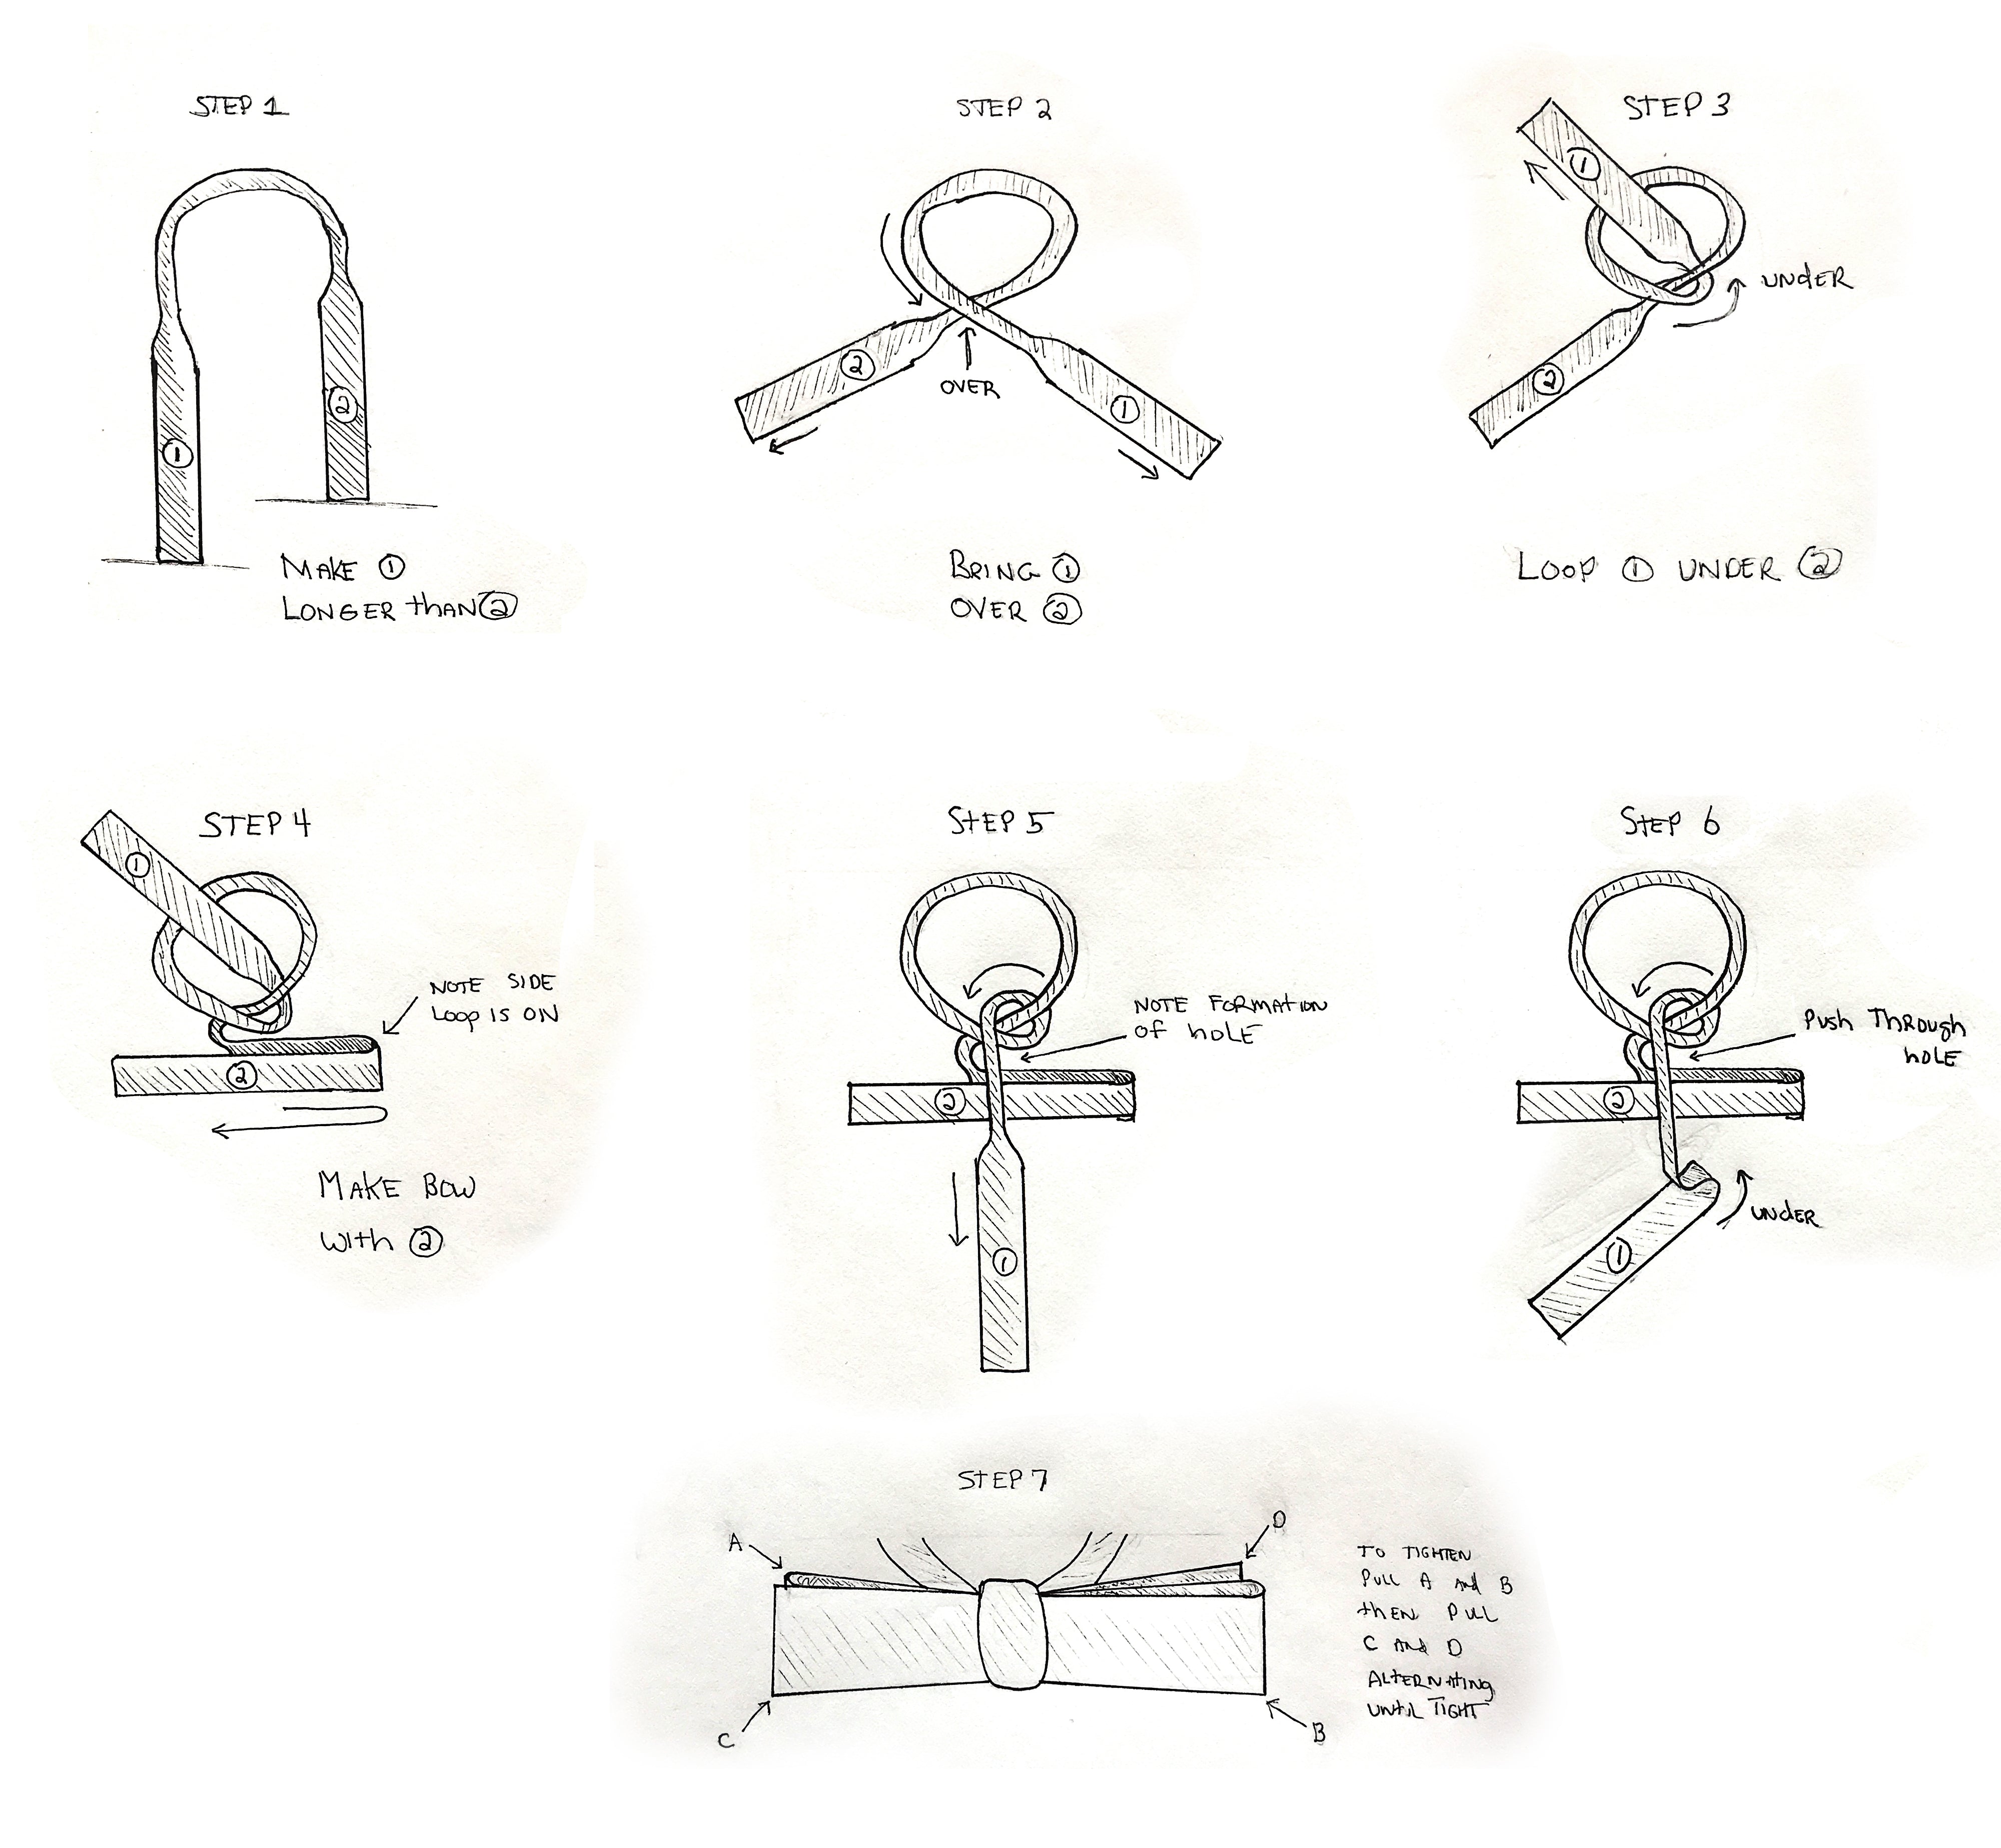
STEP 1. Adjust the bowtie so the right side is shorter than the left. The left side of the bow tie will be referred to as (1) and right side will be referred to as (2).
STEP 2. Move (1) across and over (2)
STEP 3. Bring (1) under (2) and up through the neck loop.
STEP 4. Create a bow shape from (2) making sure the loop is to your left.
STEP 5. Bring (1) over (2) directly in the center of the bow shape you made with (2). Note the small hole that this creates behind (2)
STEP 6. Create a bow shape with (1) and go under (2) and through the small hole you created. Make sure the loop ends up on the opposite side of the loop you made in STEP 4.
STEP 7. Pull on opposite ends of the bow tie to tighten. First A and B, then C and D. Keep adjusting until you get the perfect batwing bow tie.